
Replace Ball Joints
© Copyright 2006 Chuck Kopelson FlashOffroad.com 05/28/2006
Updated September 22, 2006
The first thing I like to do is to power wash the mud and grease off the area I'm going to be working on getting all the dirt out of the threads. When you're working on the floor without a lift having big clumps of mud and grease drop on your face and in your eyes isn't pleasant. Next spray all the nuts and bolts with WD-40 or PB Blaster and let it soak in. This will save you a bunch of work trying to remove stuck bolts. Once you remove the nuts, bolts and washers clean off the threads and wipe all the crud off the washers.
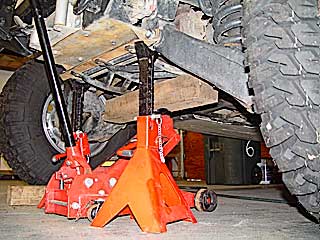
I am replacing all 4 front ball joints so I jacked up the front end and supported it with 2 heavy duty 6 ton jack stands. Use at least a 3 ton jack. You will be getting under the truck while doing this so don't take any chances with your safety. The front of the truck weighs close to 4000 pounds and can easily crush you.
Remove the wheels.
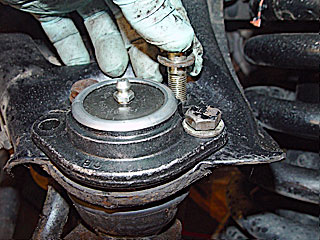
Remove Upper Ball Joints
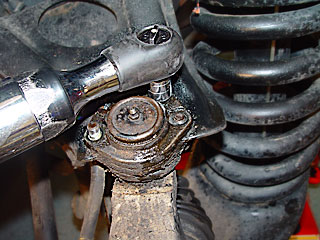
Using a 9/16" socket and wrench remove the 4 top bolts. and pull out the ball joint. Yea right! If you never did one of these before you're in for a surprise. The ball joints are all tightly seated in tapered holes. You will need a ball joint separator otherwise called a pickle fork to get the uppers off. You can bang the lowers up and out with a heavy hammer but the half shaft is in the way of using a hammer on the uppers. If you're stuck in the field without a pickle fork remove the half shaft. Don't waste your time screwing around with a pry bar, get the right tools.
Remove the cotter pin and slotted nut (15/16" socket) from the lower bolt and toss out the old pin. Take a 15/16" ball joint separator (pickle fork) and whack it with a heavy hammer until the ball joint pops up out of the tapered hole. The geared hub will drop down out of the way supported by the lower ball joint.
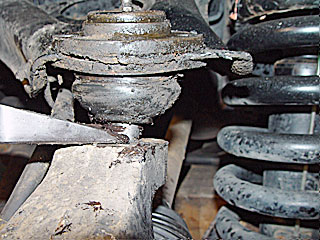
You can now pull the old ball joint up and out of the upper control arm.
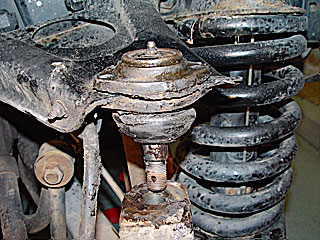
Install Upper Ball Joints

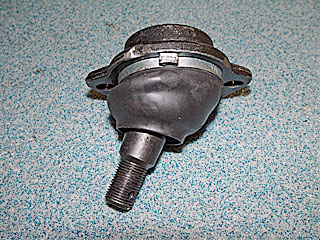
Clean all debris around the hole in the hub and the upper control arm. Drop the new ball joint into the hole in the upper control arm. Make sure that the rubber boot does not get pinched in the control arm hole. Push it down clear through.
Bolt the Ball joint to the hub first and then to the A arm.
Put a small jack under the geared hub and raise it until the new ball joint bolt is through the upper geared hub hole. Hand tighten the slotted nut.
Line up the new ball joint and drop the 4 bolts and washers into the holes. Tighten the bolts to 37 ft-lbs. Tighten the 15/16" bolt to 73 ft-lbs while lining up the slot in the nut with the hole in the bolt. Tighten the nut to line it up; never loosen. Insert a new cotter pin.
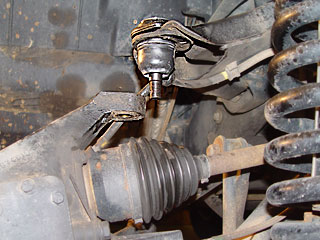
Removing the Lower Ball Joint

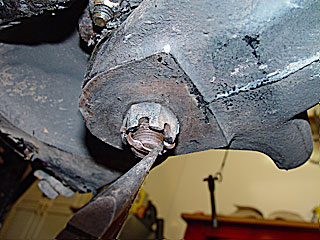
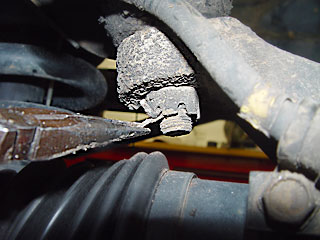
Notice that the bolts on the front lower ball joint are not all facing the same direction. The outside bolts have their heads facing up. On the rear the nuts are all facing up. The lower ball joint bolts are a different size then the upper bolts. The bolt heads take a 5/8" and the nuts take an 11/16" wrench. Remove the 4 bolts that hold the lower ball joint to the lower control arm. The 2 bolts on the ends are the hardest ones to remove. It's very difficult to get a wrench on the bolt underneath the ball joint because the control arm wraps around it. I used a thick Craftsman open end wrench pushed on the hex vertically. You may be able to get enough of a socket on the head but it won't go on square. One of the nuts was so tight I had to heat it up with a propane torch. Remove the cotter pin from the slotted nut and unscrew the nut using a 15/16" socket.

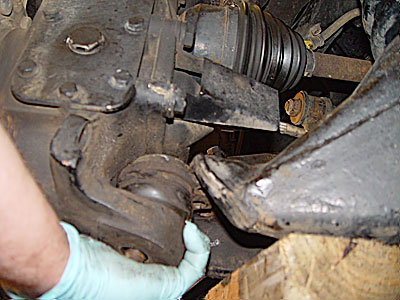
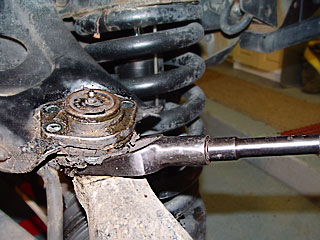
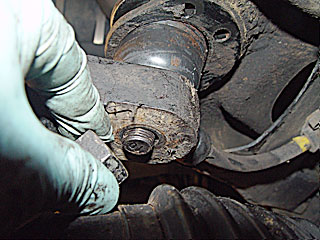
Raise the lower control arm up fairly high (not the geared hub) with a jack and hammer the ball joint till it breaks loose. Jack the arm up a little more and pull the bottom of the geared hub away from the control arm while pulling and rotating the ball joint up and out sideways.
Installing the Lower Ball Joint

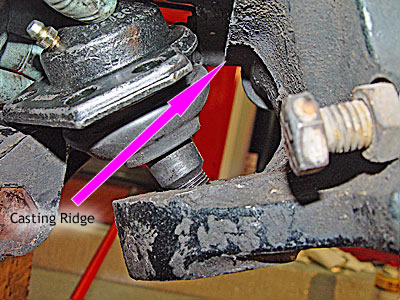
Bend the new joint all the way over to the side. Twist the joint about 90 degrees and it will drop into the hole in the lower geared hub. The first time I tried to put one in I tried to get it in straight and it got caught up and jammed on a small ridge which is part of the geared hub casting. The lower joint goes under the lower control arm.
 Start the slotted nut on the bottom ball joint. Slip the ball joint under the the lower control arm, line up the holes and replace the 4 nuts, bolts and 8 washers. Torque these to 65 ft-lbs. Remember that the outside 2 bolts are heads up on the front. Tighten the 15/16" slotted nut to 73 ft-lbs while lining up the slot in the nut with the hole in the bolt.
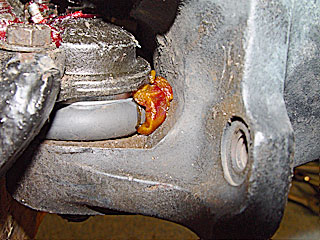
Grease all the ball joints until grease oozes out of the seal. Install your wheels, lower the jacks and you're ready to go. You might want to get your alignment checked.
