Sound and Heat Insulating a
Diesel Hummer
©Copyright 2000 - 2007 Chuck Kopelson 12/14/2007
Updated December 14, 2007
I have been a H1 pilot since 1995 and started out with a 6.5 NA Diesel Hardtop with Slantback shell. I then went on to buy an Open-Top and 2 additional Wagons over the years, all with 6.5 TD's. For about 1 year, I actually owned all 4 trucks together and that provided me with some interesting test and evaluation opportunities with regard to sound and heat insulation. Many years of ownership has given most of us some experience with the unique needs of these trucks and understanding as to where they are deficient.
I have some friends of mine in Moscow, Russia that own H1's. In Moscow, it is a huge status symbol to own a Hummer H1, but only if it is outfitted like a Mercedes-Benz with similar levels of comfort. One of my buddies is a serious audiophile and decided that he wanted to take his Hummer H1 and convert it to be Mercedes sedan-like. He hired some serious Russian audio engineers to take acoustic measurements and to determine where the majority of the sound was coming from on his hardtop.
They discovered that the engine cover, transmission tunnel and front wheel arches contribute to most of the noise experienced by vehicle occupants.
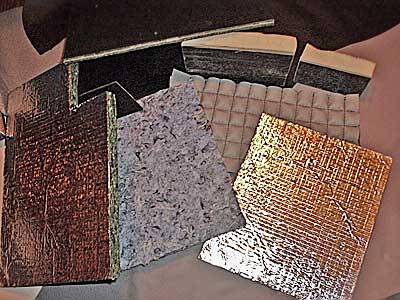
The engineers welded up special metal containers, like pillows, that fit in the fenderwells front and rear. They were filled with pressurized polyurethane expanding foam. The interior was covered in 3 layers of insulation material. Layer 1 was Dynamat Hoodliner (Reflects Sound), Layer 2 was Accumat .45" sheet, asphalt based (for vibration damping) and layer 3 was Accumat AMT 750, (which insulates, absorbs and dampens). He ended up using 5 layers of acoustic insulation to insulate the engine cover and treated the roof with some Learjet Honeycomb sound insulation material because if you put the asphalt Dynamat or Scosche stuff on the roof of your Hummer H1 during summer time, it will melt. The improvements were significant.
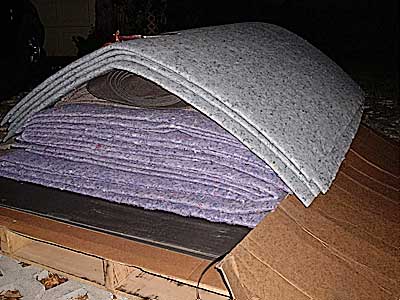
 Around this same time, Mercedes-Benz had introduced the Maybach. The Maybach boasted an interior "quieter than a library at 75 MPH". This inspired me to no end and I immediately had images of piloting an H1 and sitting in Mercedes comfort. Champagne fell from the heavens. Talk about the best of both worlds. My firm works very closely with Mercedes-Benz and the Maybach division. I called up a Maybach sound engineer and explained what I wanted to do. I sent some Hummer interior images of areas that my Russian friend had outlined above as being "noisy spots". They then sent me small sample pieces of some of the Maybach interior acoustic and insulation materials. Some of the stuff is very space-age and looks like it came off of the Space Shuttle and NASA made it, rather than an automotive company. Before I could say "Jawohl", a pallet was dispatched from Germany with 300 pounds of sound insulation, leather and carpet. I thought they sent it ocean freight but 2 days later, DHL showed up and handed me an eye-opening 4-digit freight bill. Good thing the interior materials were complimentary!
 My Open-Top is admittedly a street queen and I do drive this truck several times a week. The lack of thermal and acoustic insulation was annoying, so I decided that this would be my guinea pig for my sound insulation experiments. The engine noise is very pronounced with an open-top. My drive tunnel would also get uncomfortably hot on long trips (2 hour drive) and the radiated heat was not welcome.
I also had about 200 pounds of Cascade Audio sound deadening material, bringing the grand total to 500 pounds of stuff to play with. I was admittedly determined.
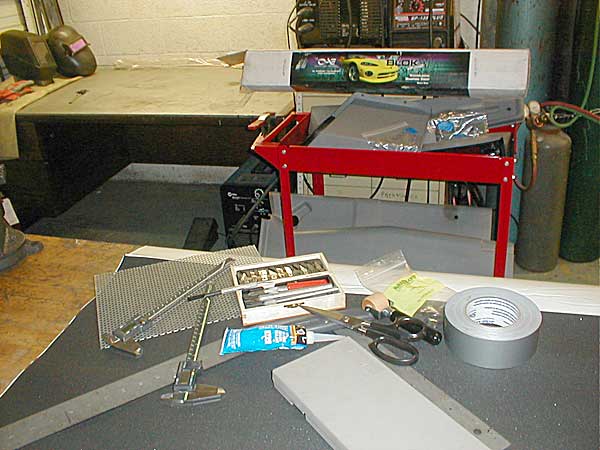
Materials you will need:
Sound Insulation Materials
Spray Cleaner / Degreaser
Old Rags to use with the cleaner
Good Scissors
Cutco Scissors or serious Shears
Mat Knife
Xacto Knife
Duct Tape :O) (When do we ever NOT use or need Duct Tape???)
Sharpie Marker Pen
Ruler / Straight Edge
Heat Gun (Bought a cheapy Chinese Heat Gun at Harbor Freight Tools and it still works to this day no problems for $9 bucks. I love it) it will get dirty.
3M Spray Adhesive ....77 and 90 I think is what I used.
DAP Weldwood Contact Adhesive Cement (It is yellowish coloured and thick. They sell it in a red can at ACE Hardware)
Cheap .75 cent ACE Hardware Paint brushes to apply the glue
Glue thinner
Aquarium Silicone, Clear
Blue Painter's Tape and Ziploc Bags for holding trim panel retainers and interior screws
Assorted basic tools - Philips head screw driver, Allen keys for removing seats and a socket set
Spray Dye if you want to re-dye your interior panels while you have them out of the truck, now is the time. I did this to some panels and I had a local upholstery shop do it for me. The dye comes in a spray can and I paid about $100 to have some panels dyed. It was no big deal and they look brand new. My truck only has 25,000 miles but the B pillar seatbelt trim panels and the window motor trim panel were faded. Get your phonebook and look up Automotive Upholstery people in your area or call a local car dealer and ask for references. It doesn't have to be you H1 dealer or your GMC dealer. Toyota and Mercedes can help you, too.
2-3 days worth of time and patience

NOW IS ALSO THE TIME TO CHECK, DOUBLE CHECK AND THEN TRIPLE CHECK IF YOUR TRUCK HAS LEAKS OR NOT WHEN IT RAINS. MORE ON THIS LATER. If it leaks, fix the door seals or find where the leak is located and then fix it.

