
A - Arm Bushings
Updated September 24, 2007
 They're a few reasons to remove the A-arm.
- Replace a rusted or stress cracked part
- Replace the bushings
- Repair the alignment cams on 98 and newer trucks
Remove the Arm from the truck, Here's the catch 22 of the whole job. Check to see if the A arm bolt that faces the spring has it's bolt head facing the spring. If it is you will not have enough room to pull it out of the A arm without hitting the spring seat. This is shown by the space between the 2 black arrow heads in the picture. According to my 1998 parts book the bolt is a 3/4 x 5.25 inches long. This means that you have to remove the spring and the spring seat just to remove this bolt.
It looks like I can get the A arm bolts off without taking the spring brackets off. I guess you can unbolt the A arm bracket from the frame with the A arm still on the truck and slide the bolt out that way.The pair of lower bolts holding the bracket to the frame are welded to a steel plate so they won't turn when unscrewing the bracket from behind.
There is a possibility that once the bolt is out it can be reassembled by inserting it from the inside of the A arm so the next time (if there ever is a next time) it will come out easier. If this works you could pull the bolt out as far as it will go and use a cutting torch to cut it in half. Then reassemble it by inserting a new bolt from the inside.
It won't cost too much to have your local auto parts or machine shop press out the old bushings and install the new ones. All the r&r time is the expensive part of the repair. I send them out. It costs me $25.00 for all 4 upper A-arm bushings. If you want to do the job yourself here's how.
Once the Arm was off, I drilled about 10-12 holes all the way thru each of the rubber bushings.
Using a flat piece of steel with a 5/8 or 3/4" hole in it. I turned the Arm sideways, place the steel on top of the lower bushing with the holes aligned. I slid a long, large threaded rod down thru the top bushing down close to the flat piece of steel and put two or three large 2" washers and two nuts on the threaded rod. (from top to bottom, washer, washer, nut, nut) Make sure the washers are 1/8" smaller then the bushings. Screw the top nut all the way up to the bottom of the upper bushing with the two washers above it. Then screw the lower nut up about 3-4 inches and slide the rod thru the lower bushing and screw the upper nut back up.
 At this point you have a rod firmly attached to the lower bushing. With the whole thing in a vise, start tightening the lower nut against the steel plate. This will push on the upper bushing out. Invert setup and do other bushing.
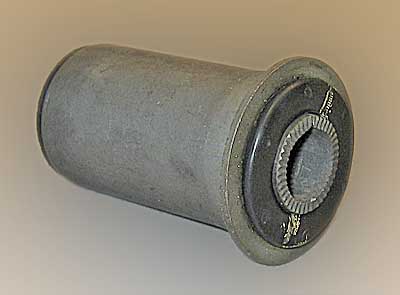
This only removes the rubber portion of the bushing, the outer collar is still in the A-Arm. Now simply use a hack-saw blade and make a single cut along the length of the collar and the lip, once this is done, you can tap the bushing collar out of the A-Arm. To install the bushings, I used the same rod and a "spring perch" and "pulled" the bushings in to seat them, Anti-seize is a must here.
