
Heating Unit Removal & Replacement for Pre-1997.5 Hummers with the Older Acme HVAC Systems
Updated February 15, 2009
|
|
|
|
|
|
|
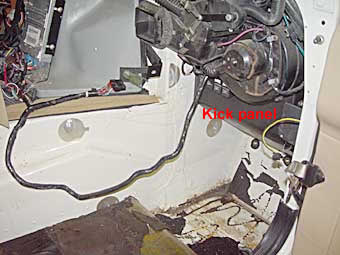 Remove the side tunnel trim panel and disconnect all wires between the harness and the heater unit. Remove the lower center kick / trim panel. Pull the carpet back. |
|
|
|
|
|
|
|
|
|
|
With some creative movement, the unit will come out. Remember that the unit has foam insulation and lots of RTV on the engine side, so some force is necessary. |
||
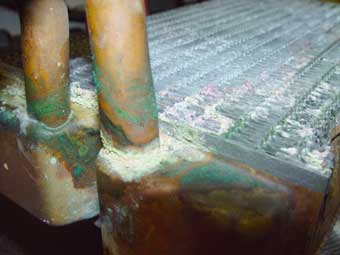
On the right - I took the heater box apart and found that the heater core was leaking at the inlet and outlet tubes. |
 |
|
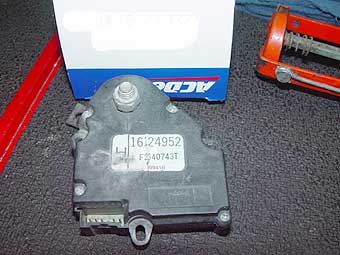
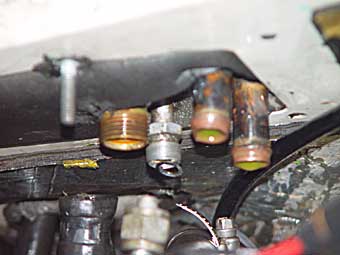
Below is the heater valve and the Electric heater valve actuator. The heater valve turns the hot water going to the heater core on and off. This combination has had a lot of problems. If the hot water is on while the A/C is trying to cool the truck you will get hot air. The actuator has a tendency to twist away from the heater valve. There have also been numerous problems with defective head control units. |
||
 |
 |
|
|
||
Replacement is the reverse of assembly. Make sure that you clean up the area where the old unit came out so all surfaces seal correctly. The entire process should take about 7-8 hours. With some experience, it could probably be cut to 6-7 hours. If you are an amateur doing this for the first time it could take 25 hours. Here are some tips on putting the unit back together. The width of the unit is the problem in fitting the unit back in place. If you're not careful you will bend and weaken the inlet and outlet tubes around the solder joints to the tank possibly causing premature failure. One owner did the following: Getting the heater box back in is the biggest pain. If you bang the ends of the core which are weak the solder works loose and you're back to square one; a leaking core. In fact, that's where my core leak was in the first place.
I had the copper inlet and outlet tubes to the core trimmed off 1/4" and re-flared by the radiator shop. This leaves enough pipe for the heater hose to connect to. Then I used epoxy putty; the kind that you knead/ mix by hand and formed it around the tank and inlet / outlet tubes where the solder joint is. I used 1/2 a tube of epoxy per tube and made a large cone shaped mound that was narrow at the top and about 1- 1/2 inches at the bottom. I joined the 2 mounds together at the bottom. This gave a lot of extra support to a weak area where the tubes enter the tanks. |
||
|
||


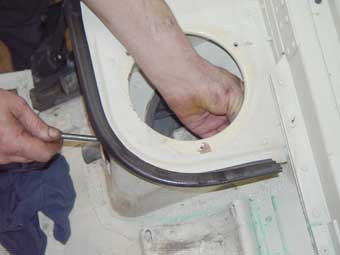
 Remove Air Intake and Mushroom Cap
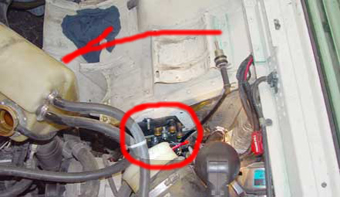


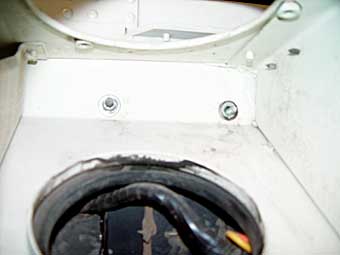

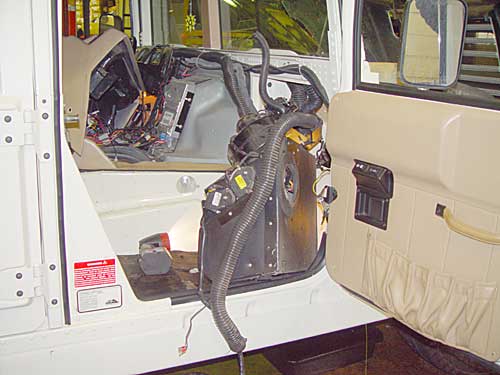 Remove all the duct hoses from between the body and the heater box. Remove the drain line and the vent line at the floor.
 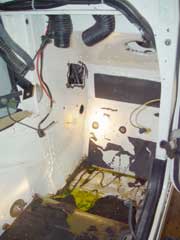 This is what it looks like with the heater box removed.
 When you could get them replacement units included all temperature sensors, motors and harness connectors.
  Even with the trim removed per the above instructions fitting the heater box back in place without dragging the fragile inlet and outlet tubes along the trans tunnel was impossible. After all my work I didn't want to risk damaging the heater core again. To avoid damage I did the following.
  This shows where the epoxy goes. Don't put it too high up or it will keep the unit from seating in the firewall.