
Recell - Rebuild a Milwaukee NiCad Battery Pack Yourself
Updated November 13, 2013
 Four years ago I bought this really nice Milwaukee 0624-20 18v Hammer drill. I think it cost me around $250.00 bucks. It came with 2 NiCad battery packs and they had a deal where you could mail in and get a 3rd pack free. I'm a homeowner and I don't use a drill that much but when I need it I want it to work.
After about 2 1/2 years I noticed that one of the battery packs ran out of juice pretty fast. I tried all the charging tricks but it just wasn't coming back. It went totally dead about a year ago and I tossed it out leaving me with one that was good and one that was on its way out. Finally the marginal one died and the 3rd was going south fast. The drill wasn't usable.
I started looking around for replacement batteries. What I really wanted was lithium Ion because they last a long time and don't have a memory. This model drill uses the slide mount batteries. I started searching the net and found just what I needed a Milwaukee 48-11-1830 18v 3.0 AH Lithium-Ion Slide Style Battery. The problem was the price. One battery costs 94.00 and you need a Lithium-Ion charger which costs 42.00 bucks. All in all with shipping I'm looking at close to 150.00 for 1 new battery. There's no way I was going to spend 150 bucks for a battery for a 4 year old 250 dollar drill.
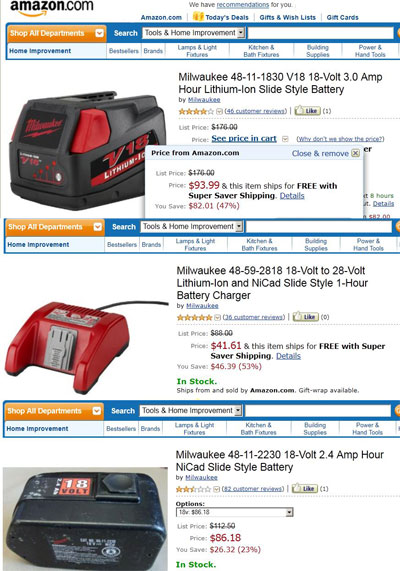
Then I found a direct replacement 18v NiCad battery for 86.00 bucks. I wasn't going to spend 86.00 bucks on the same batteries that I know would only last me a couple of years. I did find a Milwaukee 18v NiCad 2 pack for 130.00 bucks. Same problem; now I'd have 2 NiCad batteries go dead on me in a couple of years. For my uses I could buy a new drill with 2 batteries and a charger for the cost of 2 NiCad's and just toss the Milwaukee drill. I just couldn't bring myself to doing that so I just put the project aside and decided I was going to use my good old electric plug-in drill.
Then I researched getting bare batteries and rebuilding, recell, refilling the pack myself. I found some on-line places that did this for you but they charged about the same to rebuild my pack as a new one cost.
I found out that one of the major problems with totally rebuilding a pack was tying the batteries together. You have to wire 15 batteries in series to get 18 volts. The factory uses wide flat metal strips that are spot welded to the surface of each battery. If I did it I'd have to use thick heavy gauge wire between the batteries to take the heavy current load. At the same time the connecting wires have to be flat so the pack fits in the case. You also run the risk of damaging a battery if you heat it up too much while soldering. Additionally, I couldn't find a cheap enough price for the 15 bare cells to make it worthwhile.

 Around a year went by and I happened to receive a catalog from Harbor Freight that had a bunch of cheap junky battery powered tools. You could get an 18v drill for 29.00 bucks but it didn't come with a battery and charger. The 18v battery pack was on sale for 10.00 bucks (regular 15.00). I decided to get one and see if I could transplant the batteries into the Milwaukee case. I figured that for 10 or 15 bucks I'd get the use of my drill again and I wouldn't feel bad if I had to toss the batteries in 2 years. The Harbor Freight batteries were half the capacity, 1.3 ah compared to the 2.3 ah Milwaukee batteries. I figured if the first one works I'll just go back and get another pack. Since I'm not a contractor giving the drill heavy use all day the lower capacity wouldn't make that much difference to me.
I went over to Harbor freight, spent my 10 bucks and came home. The first thing I did was disassemble the battery packs. The Milwaukee battery pack comes apart by simply unscrewing 5 small torx head screws. You can get a torx set at Harbor freight pretty cheap. Lift the top off the pack. The Harbor freight came apart the same way except the screws are just phillips head. You pull the battery release tabs up and out of the case. Then all you have to do is pull the batteries out. Turns out the Harbor freight batteries are exactly the same size as the Milwaukee batteries. The Harbor freight batteries easily slid into the Milwaukee case.


The next issue was to transplant the battery connector from the Milwaukee battery pack to the new one. The configuration of the 2 battery packs is different. The plus and the minus are not in the same place. Using a volt meter I determined the polarity of the Milwaukee connector. The Milwaukee pack has the connector spot welded to the top of 2 batteries. The corresponding 2 batteries on the Harbor Freight pack were not the same.

I removed the foam pad from the bottom of the Milwaukee battery pack. I carefully removed the Milwaukee connector from the 2 batteries it was spot welded on to by using a sharp chisel and lightly tapping it with a hammer. It came off the battery in one piece. The connector was still tied to the battery pack. There are 2 black wires that attach at thermistor that is glued between a couple of batteries in the pack. I just separated the batteries and carefully cut through the glue holding the thermistor. The whole thing came out easily. I trimmed a little metal off one side of the connector with a tin snips (a scissors would work fine) and with a soldering gun put a blob of solder on each side of the connector. I then peeled off the top black insulating pad.

The Harbor Freight pack has its connector simply soldered to a red and black wire. I cut the wires off at the connector to get it out of the way. I used one of the sticky backed insulating pads I removed from the Milwaukee pack and stuck it on the top of the Harbor Freight pack because I didn't want the transplanted Milwaukee connector to short out on the exposed battery tops. The Milwaukee pack has a thermistor that cuts off the charger and the drill if the batteries get too hot. The Milwaukee charger and probably the drill won't work without the thermistor. I cut a slit in the insulating pad for the thermistor wires, separated the batteries and glued the thermistor between the batteries. With the batteries back in place I stuck the foam pad from the bottom of the Milwaukee pack to the bottom of the Harbor Freight pack. I dropped the new battery pack into the Milwaukee case.

I roughly aligned the Milwaukee connector on top of the new battery pack using the top of the Milwaukee case as a guide. I routed and cut the red and black wires from the Harbor Freight battery pack to the Milwaukee connector leaving a little slack. I soldered the wires to the connector.

Next I installed the battery release tabs. Make sure you get them on the right side. The top won't go on unless these are right. I placed the top on the case and made sure that the wires were not getting caught in the edge of the case. Push down on the top and then remove it. There are two plastic ridges in the top that will squash your red and black wires (see yellow arrows). Trim the plastic on the ridges so the wires don't get smashed. Replace the top, screw it down and charge the battery. You're done! You just saved 76.00 bucks.
