
New Style Heater Core Replacement
1998 and Newer Hummers
HVAC Facts Article
Replace Your Heating Unit
Use a Toyota A/C Unit
Rebuild Old Style Acme HVAC
HVAC Recirculate Switch
Remove the Doghouse
Updated October 11, 2016
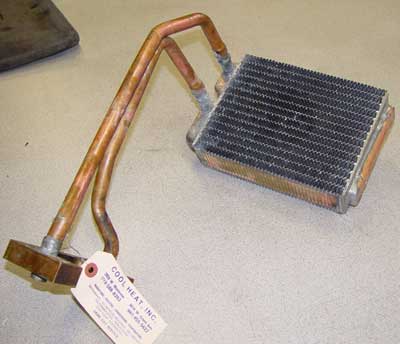
New Style Fabricated Copper Heater Core
This one was made by Cool Heat, Inc.
2859 W. Montrose, Chicago (773) 588-8393

Spectra aftermarket Heater Core
Part number 399025 Cost 25.00 (2016)
From Autozone
Hummers produced from 1998 and up have the new and improved HVAC system. Even though the system is improved doesn't mean that things don't go wrong. This system was designed so that you could service the heater core without having to completly tear apart the HVAC unit like you had to with the older trucks. It seems that the newer heater core is aluminum and in some cases like any other automotive part; breaks down. Some have had dealers repair their heater core leaks for costs of 3500.00.
In order to replace the heater core you have to remove the unit from the truck in just about the same manner that the older unit was serviced. Once the unit is out of the truck you have to cut apart the black plastic box in a similar manner that you do if you rebuild an older style HVAC. Then have a local Radiator shop rebuild a full copper heater core for maybe 150.00 with ten fin's per inch using the old core as a template like the one shown above.
Josh Rhoden fixed the leak in his 1998 HMC4. " The worst time I had with this project was finding someone to fix the core, no one wanted to touch it, so i ended up doing it myself... I just hope it works because I dont really want to tear it apart again".
The best way I found to check for leaks was to use "canned air" and dunk the core in water. If you invert the can of "canned air" it comes out in a liquid... squirt the liquid into the pipes for a few seconds then cap the ends off with your thumbs and dunk away. I was able to hold the core under water for about 3 minutes with no leaks. (after 3 minutes my thumbs were too tired holding the pressure)
Once the job's complete flush and fill the system per my instructions and have the air conditioning system recharged.
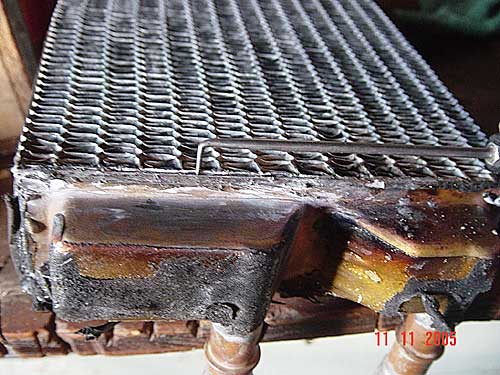
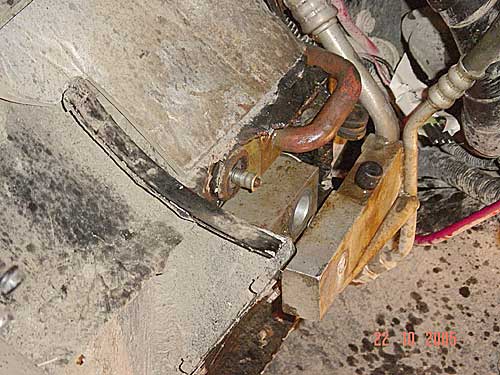
The pointer is where the old joint failed and there was some really good pitting on
the alum block where the outside lines mount to the HVAC unit.
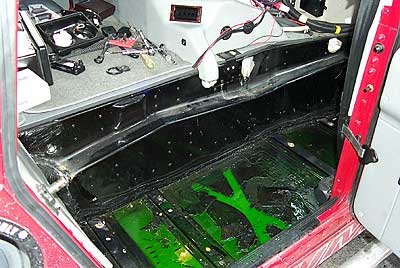
Floor with the seat removed.
Passenger side Crash pad removed.
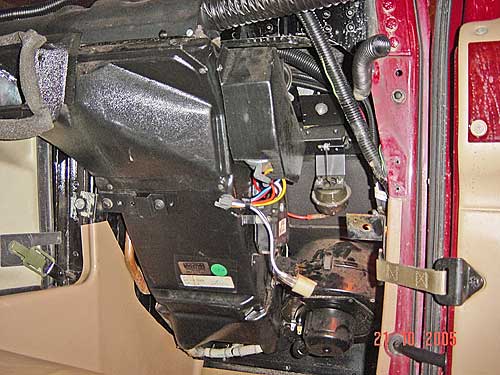
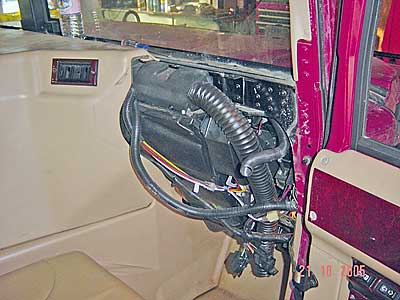
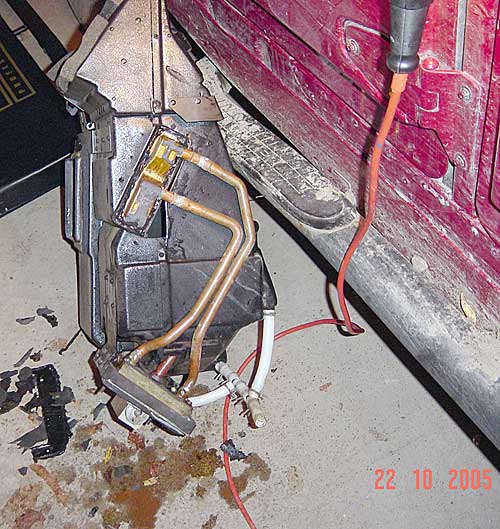
All wires and Vacuum lines removed, dog house pulled out of the way. (I did not fully remove the dog house, and I saw no need to remove the front seat.) Unit is ready to be pulled out.
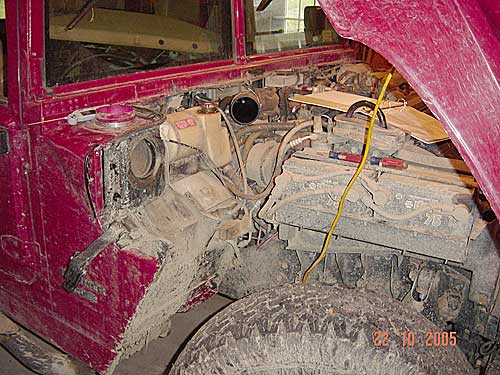
Air filter and intake components removed. (Do your self a favor and wash your truck before you start the job.) I had a hard time installing the air filter box into the snorkel, I had to lube up the snorkel elbow tube.
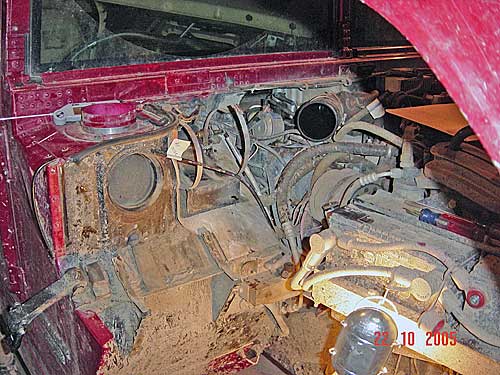
Coolant tank removed.
The “spacer” riv-nut in its location.
The bolts in Pic #13 are what the riv-nuts thread onto, there are 2, one on top of the AC union and one underneath it. Be sure to properly discharge your Refrigerant before you remove the union.
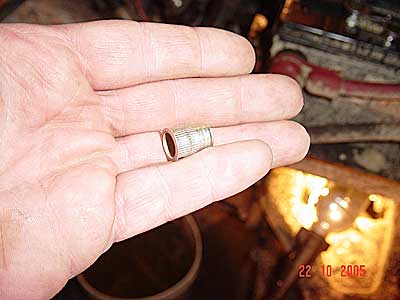
Closeup of the riv-nut spacer
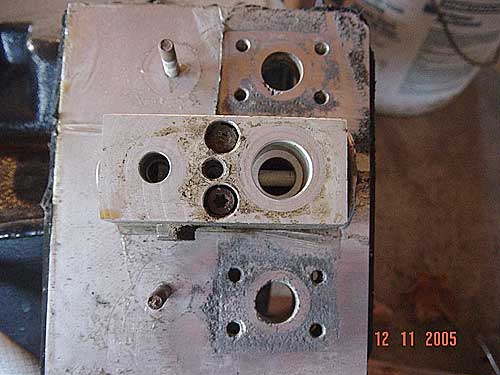
HVAC unit removed and core retainer plate removed (located on the floor to the left of the unit). Gear Wrenches work great to remove the heater core from the Aluminum mounting plate. 2 of these bolt heads stripped and I needed to use Hex head extractors to remove them.
I had some severe pitting on the external coolant mounts, I cleaned this up as best I could (obviously not finished cleaning in the pic). After the unit was reinstalled I used RTV to coat the surfaces of the brass fittings to help reduce the Galvanic Corrosion that was occurring, I also did this on the core side.
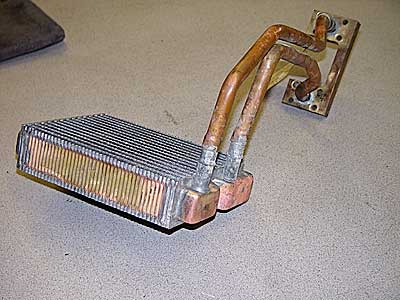
Nice New Core

The “spacer” riv-nut in its location. The bolts in Pic #13 are what the riv-nuts thread onto, there are 2, one on top of the AC union and one underneath it. Be sure to properly discharge your Refrigerant before you remove the union.
Closeup of the riv-nut spacer
HVAC unit removed and core retainer plate removed (located on the floor to the left of the unit). Gear Wrenches work great to remove the heater core from the Aluminum mounting plate. 2 of these bolt heads stripped and I needed to use Hex head extractors to remove them.
I had some severe pitting on the external coolant mounts, I cleaned this up as best I could (obviously not finished cleaning in the pic). After the unit was reinstalled I used RTV to coat the surfaces of the brass fittings to help reduce the Galvanic Corrosion that was occurring, I also did this on the core side.
Nice New Core